
Watch all my videos on YouTube!
Solar Power has put Vandwelling within reach of ordinary people. So, with full-time RVing in mind, I have begun with the installation of some solar components.
DISCLAIMER: I’m not an expert at this and this is not a How-To guide. 12V can KILL you; consult an expert first.
The very basic power source in an RV has always been the trusted lead-acid battery. That suddenly allowed you to have some (very) basic amenities, such as lights, but still required regular if not daily visits to a campground or other place where one could recharge it. With the advent of comfort while camping, the appetite for more power grew and Solar became a mainstay in Rving.
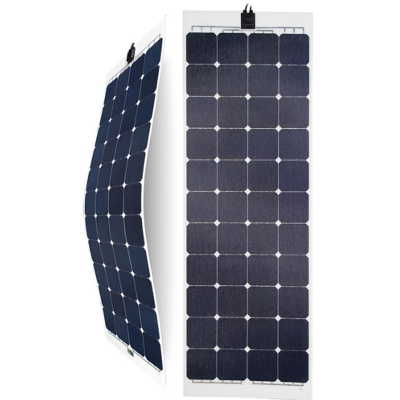
 Flexible Solar Panels
The solar part of the electrical setup in my Ford Transit consists of three flexible solar panels (LinkSolar GFL-135) with a total of 405 watts. With an average of 200 watts in solar power, most Vandwellers have enough for the basics and some extra luxury; 400 watts allows me to have and use a small fridge, a heater, lights, an induction cooktop and many electronic devices. There are many variables in calculating my power usage, and if it turns out, that more power is needed, I can easily add a couple of ‘mobile’ panels, which I can store under my mattress.
 Combiner Box
Dependent on your system, you may decide to use a combiner box, to create a single positive and a negative wire, that go to the solar controller. This can be done on the outside roof or in the interior of the van.
I connect the solar panels with MC4 branch connectors to each other and use a heavier gauge (#8 AWG) MC4 cable to get to the interior.
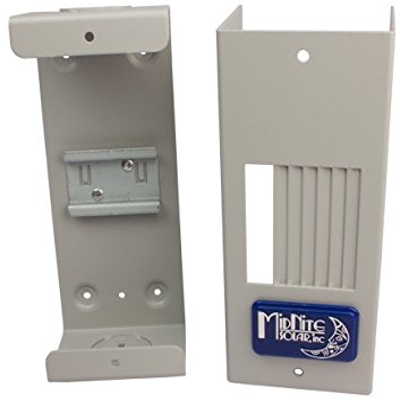
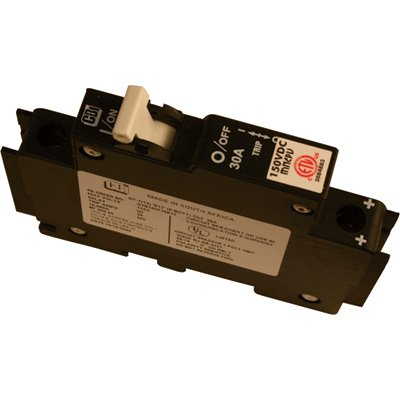
Breaker Box
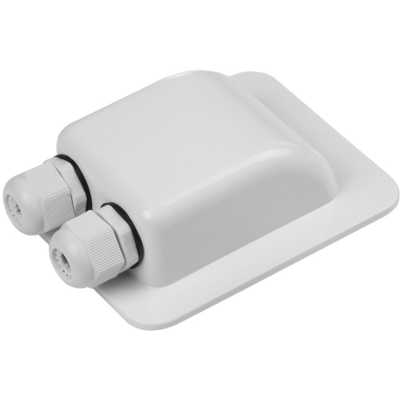
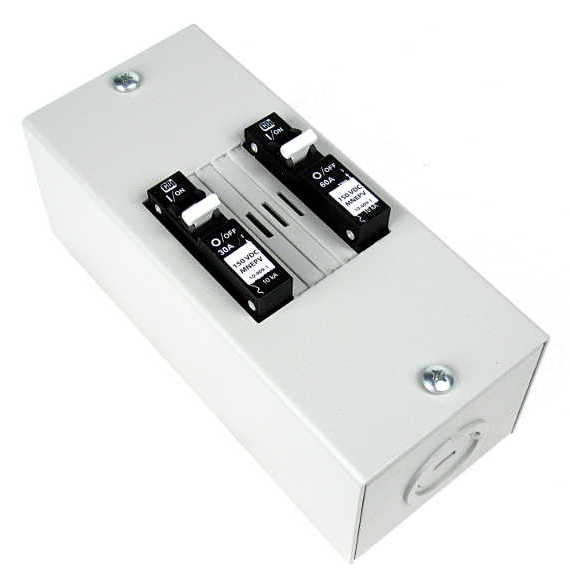 Both wires enter the vehicle through a cable gland: a small box that covers the hole where the wires enter and that protects against leakage. From here, the two wires first go to a circuit breaker and then continue to the solar controller. From the controller the wires go to a second circuit breaker in the same breaker box, before continuing to the busbars and batteries. The two circuit breakers (and possibly one more for additional solar panels) protect the wiring and allow me to work safely on the controller and/or panels by disconnecting the power.
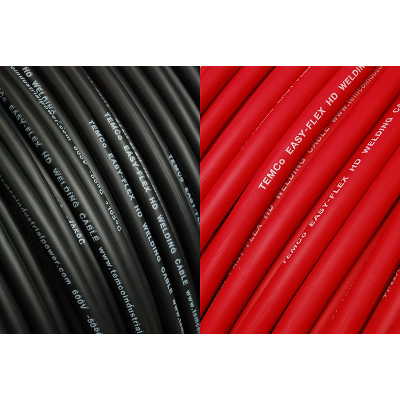
Voltage Drop
12V Wiring tends to drop the voltage, even over short distances. Besides keeping the distances between components as short as possible, using the right size (or gauge) wire is of utmost importance. From the first circuit breaker to the controller and the busbars, I increase the wire size from 8AWG to 6AWG. Then to 2AWG from the bus bars to the batteries.
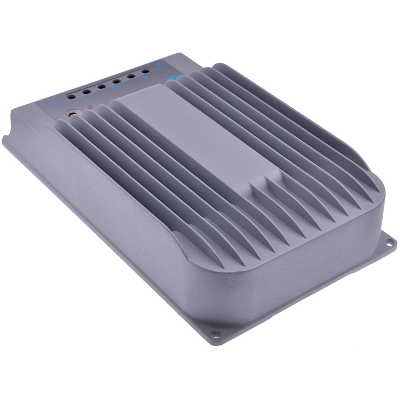
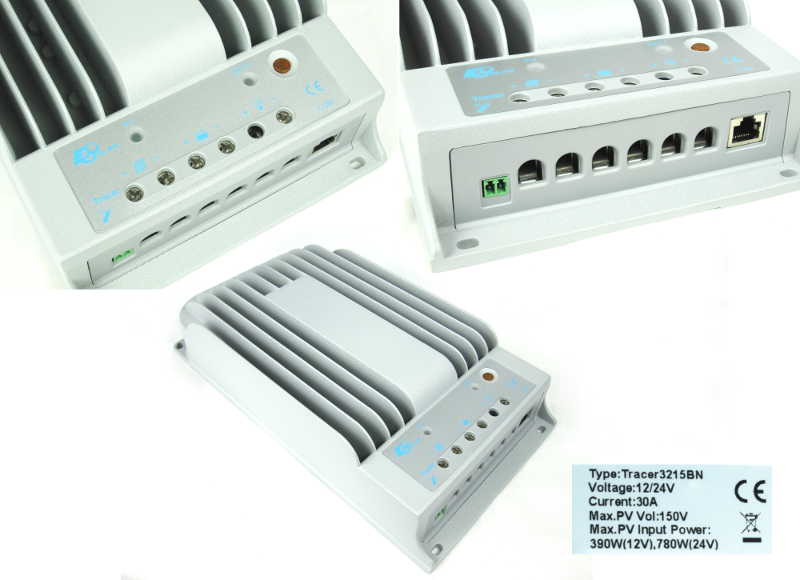 Solar Controller
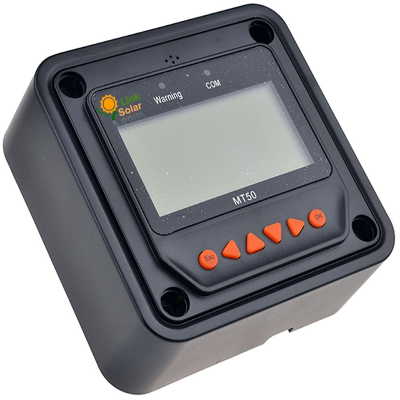
I use a MPPT controller (EPSolar 3215BN) instead of a PWM controller, as it gives a much ‘cleaner’ signal and doesn’t restrict me on the type of appliance, that I can use. It also uses the extra voltage, to push more amperage into the batteries.
Busbars
This setup ends at the two busbars. From here, a line goes to the batteries and to a separate fuse box, from which all the individual lights, charge points and appliances are powered.
Next step is the installation of the flexible solar panels on the roof.
* LinkSolar is a sponsor of this website and has graciously made available some tools and equipment, to make this installation a better experience.
-

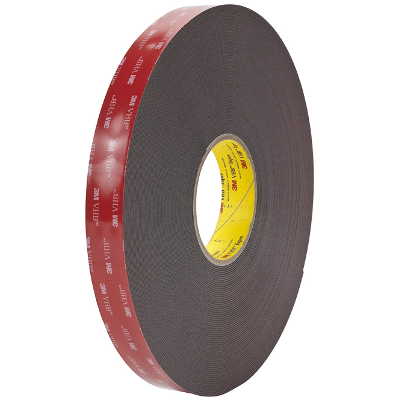
3M VHB Mounting Tape 5952
BUY AMAZON -
6 AWG Welding Cable
BUY AMAZON -
8 AWG Extension Cable MC4 Connector
BUY AMAZON -

Blue Sea Fuse Block 12 Circuit
BUY AMAZON -
Blue Sea Systems BusBar 2307
BUY AMAZON -
Dual Temperature Heat Gun
BUY AMAZON -
ETFE Sunpower Flexible Solar Panel
BUY -
Heat Shrink Tube
BUY AMAZON -
JAXPETY 10 Ton Hydraulic Cable Lug Crimper
BUY AMAZON -
Midnite Baby Breaker Box
BUY AMAZON -
MidNite Solar PV DC Circuit Breaker
BUY AMAZON -
MPPT Solar Charge Controller
BUY -
Plusnuts – Pre-Bulbed – 1/4-20
BUY AMAZON -
Solar Double Cable Entry Gland
BUY AMAZON -
Solar Double Cable Entry Gland
BUY AMAZON -
Solar Remote Meter MT-50 for Tracer BN series MPPT Charge Controller
BUY AMAZON


Thanks for your videos. I see you have your solar panels charging 2 6V batteries that you have located in the back. I assume you’ll be running most of your appliances from it. But, if I’m not mistaken, you have a double battery under the drivers seat that feeds 3 60amps custom connector points for a total of 1800amps that you’re hooking up to an inverter, too. What will you be powering off of it?
I look forward to your feedback on the use of your solar panels
Hi Lucy,
The entire conversion is still a work in progress and fairly slow, because of all the video editing and the work on the website. That’s fine with me as it is about the journey, not specifically the end result. Because I started using the van on short trips, that gets longer as the conversion progresses, I decided to install the solar earlier in the process. I installed two 6V batteries as a temporary solution; they will be replaced at a later time with a Lithium battery bank. That will be the house system with a 2000W inverter/charger.
My Transit came with only one car battery and I expanded the single 60A CCP slot to three, totaling a max. 180A. That will only work when the engine is running (directly from the alternator). At the same point, a separate ‘shore’ connection (cable) enters the vehicle. I will have a selection switch, where I can select between alternator and shore. While many use an isolator to use the alternator to charge the house batteries, I have never liked that solution. I’m not an expert at this, but I don’t like to mix different batteries on the same charging system. The way I set it up, keeps both the car electric system completely separate from the house system. I will connect a separate 1000W inverter at the CCP (180A). This can be switched on to charge the house batteries. In my original design, I also had the option to connect it to a low power water heater, but with my current experience of the solar panels, I will likely forego on that. I also still have the option to connect the fridge at the same point. As I said it is a work in progress.
One or two months ago I installed the three 135W flexible solar panels and while I have only few loads on them at this time, they seem to work better than I expected. I will probably have no power issues with the fridge or electric water heater and while I made provisions within the system to add more (mobile) panels at a later time, that may never be necessary.
If you have more questions, please let me know.
Have a great day!
Van Williams
Thanks for the reply, Van. So are you planning to keep the lithium battery with the 2000 W inverter in the back of the van? If so, when you want to charge the lithium house battery from the alternator/180A 1000W inverter that’s in the front of the van, will there be too much of a voltage drop?
Hi Lucy:
First, voltage drop can be minimized by thicker cables, but in this case the 12V/180A (max) from the alternator goes to the front 1000W inverter and inverted to 110V and then by cable ~15ft to the rear inverter/charger to charge the batteries. Only one or two feet of the 12V stretch has less than 1% voltage drop and you just don’t have to worry about the 110V part. What is more important in this case, is the loss of converting from 12V to 110V and back to 12V, but since this would be used while driving, that’s not a concern to me either. I think (hope) that I can recharge the batteries completely in less than two hours driving.
Van Williams
Hi Van,
I get what you are saying. My plan is to have the solar wiring come in close to the front driver’s door, so my house batteries will be close to the 1000 W inverter. I have dual batteries with a heavy duty alternator and would love to use one of those batteries for the house battery. But I’m a little concerned that I’d over charge it or somehow mess up the van electrical system . If you have any other suggestions for my setup, please let me know. Thanks again.
Van, did you install your 2000W inverter/charger to your house batteries? If so, does the solar system still go to the batteries like you showed in your video, or did you connect them to the inverter/charger?
Hi Lucy,
The two large bus bars are, let’s say, at the center of the system. The solar panels go to the controller and continue to the (positive and negative) bus bars. The battery bank and inverter/charger are also connected to the same bus bars.
I probably will use an inverter with an integrated charger; the setup is a little different when you use an inverter and a separate charger. Always follow the instructions included with your inverter, including cable lengths and thicknesses. If you have ANY doubt about the installation, have someone with knowledge about these systems, check it out. You can get seriously hurt from a 12V system (BTW the charger is 120V).
Van Williams
Van, I think I heard you say in your video that you used a 30 A breaker coming in from the solar panels and a 60 A circuit breaker coming from the solar controller. Is that right? If so, why the higher Amps from the controller?
Hi Lucy,
Besides the fact that these circuit breakers are used to isolate the system, so work can be safely performed on each part of it, they also protect the wiring and the components that are attached to it.
I have three 135W – 5.7A – 29.4V solar panels. The higher the voltage, the less voltage drop in the lines. That is a total of max. 17.7A that goes to the controller at max. 29.4V (with the ability to add a fourth panel: max. 22.8A). I use the highest number (22.8A) times 1.25 to come at a 30A breaker for the power coming in.
After the current from the solar panels is processed by the MPPT controller and depending on its settings, it’ll come out and go to charge the batteries at approx. 14.3V and the general calculation goes like this:
In: 22.8A x 29.4V = 670W (theoretical maximum).
Out: 670W / 14.3V = 46.8A times 1.25 = ~60A.
While these calculations are simple and easy to adjust for your own situation, if you don’t have more than a basic knowledge on the subject of electricity, please contact someone who does. While a 12V system seems safe to work on, voltage and amperage can be high and can really hurt anyone who works on it.
Hope that makes sense 🙂
Van Williams
PS Remember, I am not an expert at this. If you don’t know what you’re doing, please consult a qualified professional.
Thank, Van. That’s a great explanation
Hi Patica,
It’s difficult to know what stores carry nationwide, but locally (Central Florida) Home Depot has “GAF 0.5 in. x 4 ft. x 8 ft. EnergyGuard PolyIsocyanurate Insulation Sheathing”. That my differ from your store, but the crucial search term is ‘PolyIsocyanurate’ or ‘PolyIso’.
If neither can be found, try to find a material with similar R-values or look at a local (family-owned) building material store.
If that doesn’t work out, Thinsulate is an automotive insulation material, that is well-suited, but is somewhat expensive. You can buy it on eBay. eBay-Thinsulate
Let me know if it works out. Take care.
Van Williams