
A Floor is a Floor or NOT?
The floor is based on multiple factors, such as interior height, type of heating and storage requirements
Laying an insulated floor in an RV serves two purposes. The insulation minimizes the heat (or cold) transfer between the interior and the exterior of the van, while the subfloor creates a solid base upon which all the cabinets can be attached to.

Temperature control or more precisely control of the humidity inside the van, is the most important issue when converting a van.
This project is subdivided into seven smaller projects, that are each documented with videos, photos and a step-by-step guides. When the project is completed, the entire guide is available as a FREE download here.
How To Build & Install
Read through and understand this entire project first and then decide on the design and the type of materials used.
Before contemplating to install the floor, you should first consider the many options you might want to include.
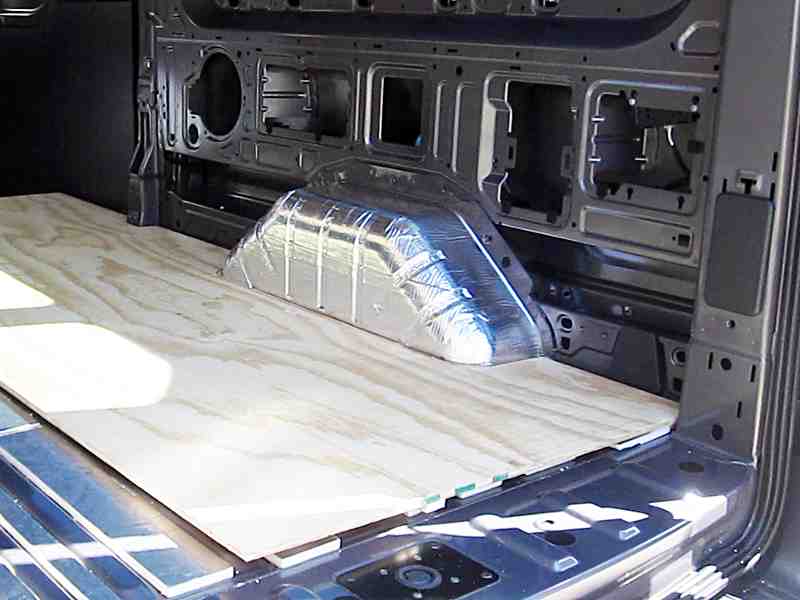
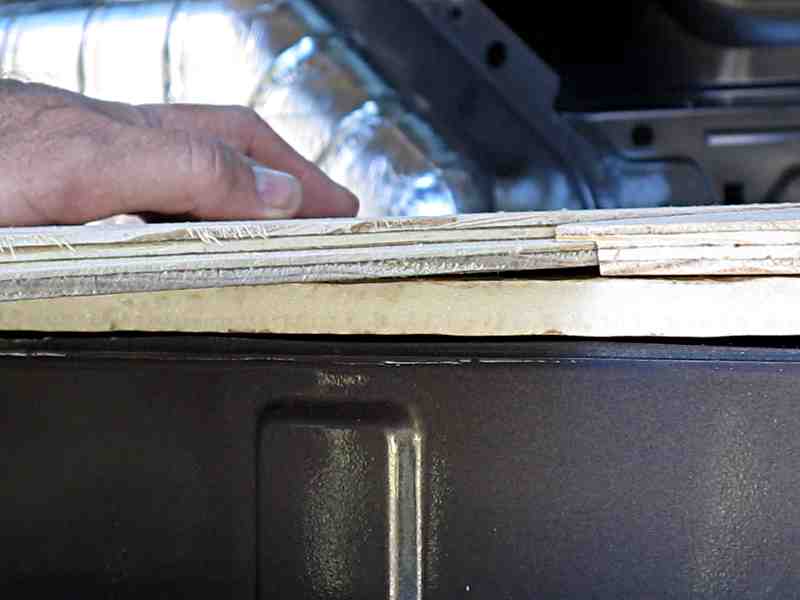
The usual van sub-floor consists of either 0.5 inch or 0.75 inch thick plywood, either directly attached to the metal floor or raised for other purposes.
Subfloor thickness
- 0.5 inch – sufficient enough to attach the cabinets to and to walk on and perhaps the 0.25 inch less in combination with less insulation underneath, adds more standing height in a medium high Ford Transit, avoiding the more expensive high roof option.
- 0.75 inch – More substance to secure the cabinets to (think of the stresses applied to it during an accident), but much heavier (weight limitations and distribution are one of the main concerns during a build).
Floor Insulation
Commonly used types of insulation in van builds are Poly-Iso, 3M Thinsulate, Natural Wool and Spray Foam, each with its own (dis)advantages.
Poly-Iso is a good candidate for the floor of the van, because of its rigidness and even when little space is available, Poly-Iso will provide the biggest R-value.
Extra floor insulation is especially important, when thinking of building an all-season van and traveling in winter.
Consider using framework under the plywood, with its height adjusted to the required thickness of the type of insulation.
Do you want a raised floor?
You can lay the plywood sub-floor directly onto the metal van floor, but that minimizes any insulation, but could be practical to gain a little more headspace in a medium high van.
Any elevation of the sub-floor allows for more insulation; it would also accommodate a wire run along either or both sides of the van, creating better access to 12V/120V wiring and even plumbing lines throughout the living space of the van.
A raise of 1″ could increase the R-Value with 6-7 points. Adding multiple inches, could allow for the creation of shallow storage areas for infrequently used items.
Implementation of floor heating will also result in a noticeable increase of the floor height.
Be aware that raising the sub-floor negatively effects the ease of entry through the side door, so do you research and decide beforehand what options you want to include.
Underfloor access
Even if you created shallow storage for let’s say your mechanic’s tools, you also have to make lockable, but removable floor panels. These will allow you to access your wiring system as well.
Fasteners
I highly recommend to use through the floor bolts to secure the sub-floor to the van’s chassis. Accidents do happen and you don’t want the cabinets or anything else attached to the floor or walls, to fly through the air and make things worse.

Floor coverings
There is also a decision to be made about when to apply the floor coverings. At the initial placement of the sub-floor, application of the finish material adds only a little extra weight, but a full covering is simple and quick to accomplish.
Doing the finish floor at the end of the build, requires less material, is more difficult to do and avoids any mishaps that will undoubtedly happen during the build.
Now is also time to think about the types of floor coverings, you want to consider installing; just a warning: don’t get carpet. Vans or RV’s in general are known sand and dust collectors. Anything like wood or vinyl is a much better choice. You’ll thank me for it!
- Download This Guide
 [ .pdf Download ] – Size: 3.4 Mb
BUILD GUIDE UPDATE
Be the first to receive an update, when a new Project is added to this Build Guide. I also include a monthly overview of newly posted videos.
New Floor Project
Choose your Mod or build this project in the following order.
Part I
Tie Downs & Wheel Wells

Noise reduction in cargo vans is sometimes important and the wheel wells are the obvious place to tackle the main source of noise production.
Part II
Paper Plywood Templates

To cut out the wheel wells and the C pillars from the plywood sub-floor, paper templates are made to accurately transfer the shape of the floor in the workshop.
Part III
Floor
Insulation

Insulating the floor, will help control temperature variations within the RV and add some sound reduction as an additional benefit.
Part IV
Insulation
Glue-Up

To reduce squeaking and prevent unwanted movement of the insulation, spray glue will hold it to the metal floor.
Part V
Spray Foam Application

The remaining spaces between the insulation panels are filled with an application of spray foam.
Part VI
Plywood Installation

The plywood sheets are fitted and installed on top of the insulation.
Part VII
Hardware & Soft-Ware

The hardware is installed, caulk applied and the finishing touches are being made.