
This Project Is Currently In Progress.
Content Is Added As It Becomes Available.
Mod: Murphy Bed/Desk – Wall Panel – Part 1
The Murphy Bed, a closet and part of the kitchen are built against the wall panel on the driver’s side of the cargo area.
The temporary placement of this wall liner allows me to fit all the components and to install the insulation and necessary cabling, before final installation.
This project is geared towards a 2016 Ford Transit, but the techniques and materials can be used in other van conversions, such as MB Sprinters and Ram ProMasters as well.
Project Murphy Bed/Desk Content
Wall Panels
What You’ll Learn:
- Using and installing Plusnuts .
- Using templates to size the plywood wall panel.
- How to adjust the size of the foam Side Airbag cover.
What You’ll Use:
- 3/4” Plywood.
- 1/8”x4’x8′ Plywood.
- Some Softwood.
- Wood Glue.
- 1/4-20-0.280 Plusnuts.
- 1/4”-20×1-1/4” SS Machine Screws Phillips Truss Head.
- SS Washers.
- Touch-Up Paint.
What You’ll Need:
- Wrenches.
- Screwdriver.
- Small Hammer.
- Drill.
- Drill Bits.
- Forstner Bit.
- Jigsaw.
- Tablesaw or other saw.
- Clamps.
- Rough Sandpaper or Small File.
- Pen & Paper.
- Compass.
- Scissors.
- Broom.
Description
In order to prepare the wall, the black polystyrene block that covers the side airbag mechanism is downsized, the wireway casing removed, the wall panel prepared and window mounts installed.
After the complete installation of the bed, cabinet and kitchen, only the small rear window remains fully accessible; the forward side window appears only when the Murphy bed is in use. The vehicle’s cabling will be rerouted inside the top cabinets.
Approximate Duration: 5 hours.
Considerations
Several issues have to be recognized. Holes have to be drilled in the metal wall as attachment points. Before drilling, first consult the BEMM (Ford Transit Body and Equipment Mounting Manual).
Search for the NO drilling zones to avoid factory installed, hidden wiring. Also identify which areas are made of boron, a hard metal that will withstand your drill bits.
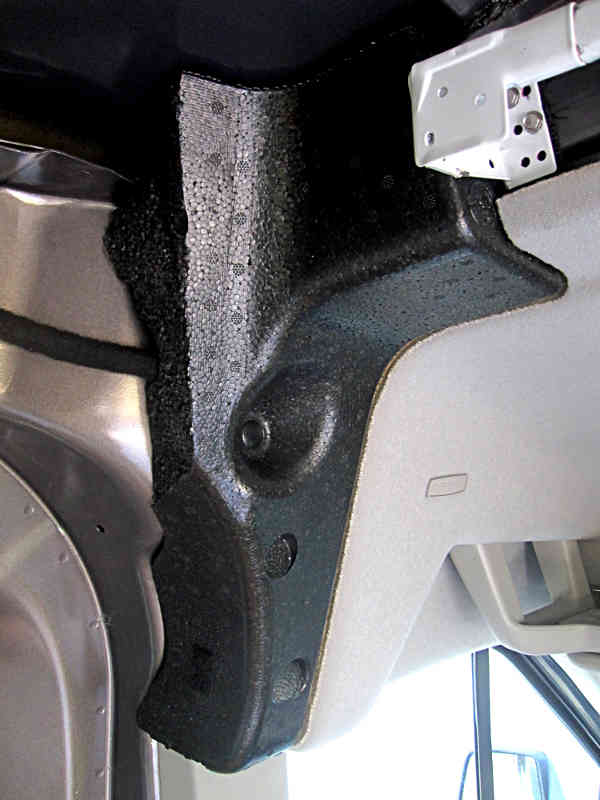
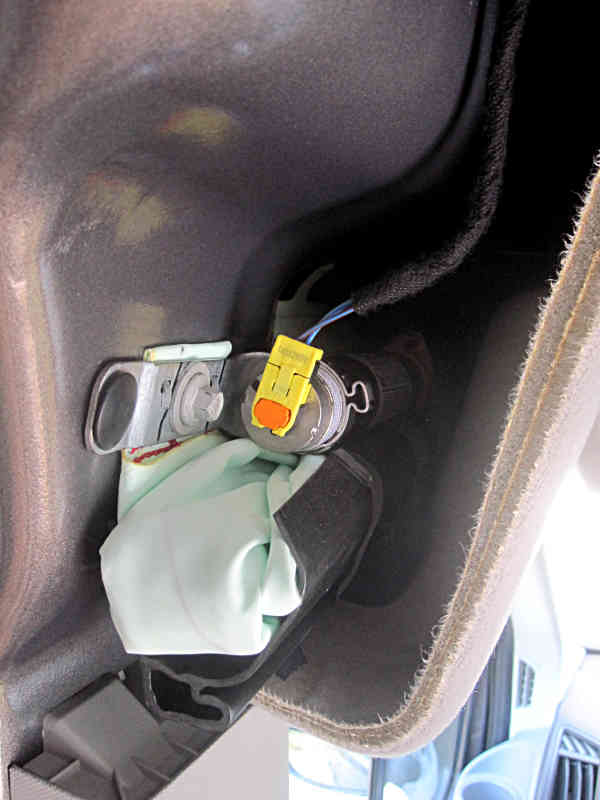
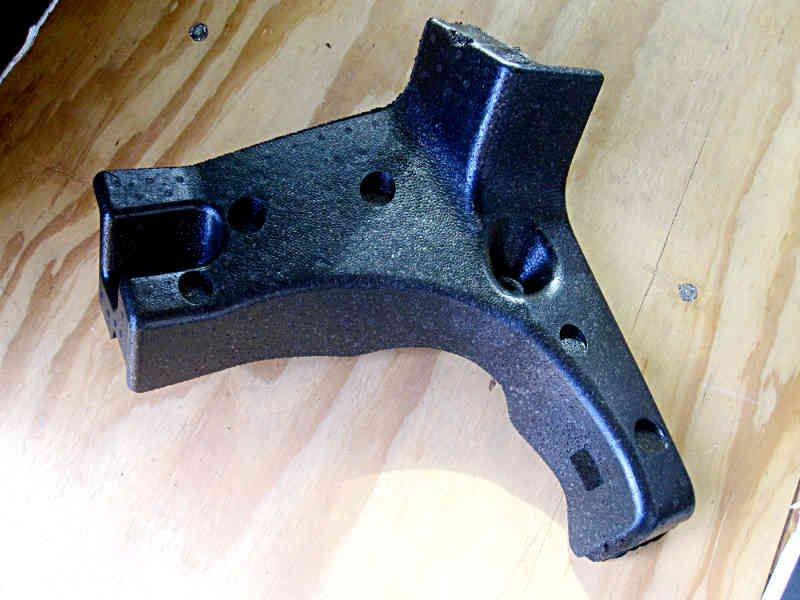
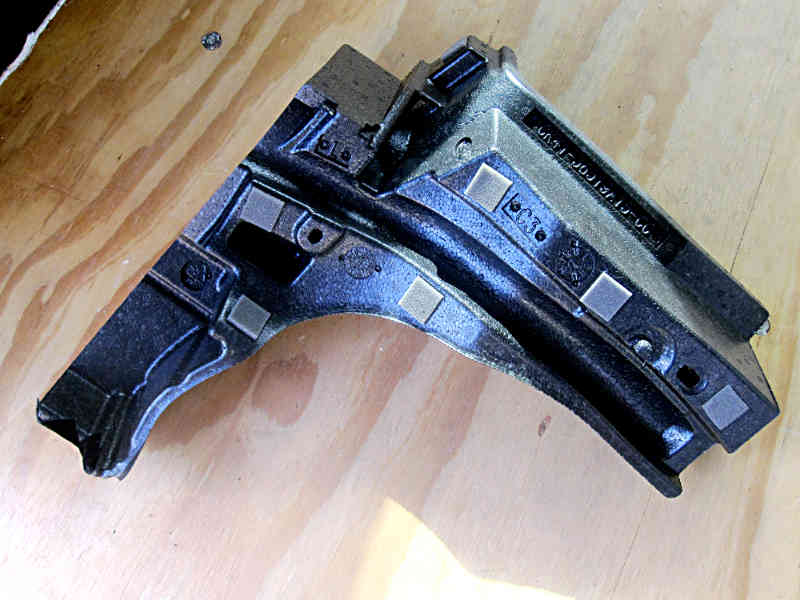
The black polystyrene block that partially covers the driver’s side airbag is a nuisance to work with and I decided to remove the leftmost part as it doesn’t seem to do much; this frees up some badly needed space. Adjust this block at your own risk or consult an expert if your in doubt.
I use two types of fasteners: plusnuts and rivets. A plusnut creates a solid mounting hole for the stainless steel machine screws. I use two basic wrenches to attach them to the metal, but that takes a little extra work and time. A special tool is available, if you so desire. While the plusnuts establish the main support points, I will use ordinary rivets to permanently connect the wall panel to the wall.
Templates are used to make the cut-outs in the 1/8” (3 mm) plywood; additional window to wall supports are installed where needed. Only the parts behind the Murphy bed will get Formica as a finish.
The Project
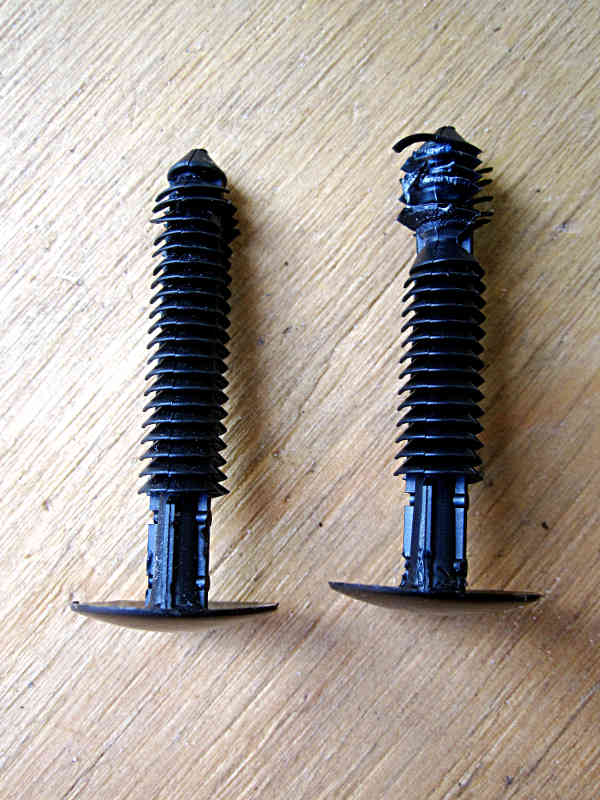
- Pull out the two plastic plugs, to remove the black polystyrene block at the top of the B-pillar.
- Cut off the top-left arm with a serrated knife. Skip this step, if you’re not absolutely sure, what you’re doing.
- Refine the cut to suit your needs. You can also do this at a later time.
- Reinstall the plastic cover. Only one push pin remains, but it is held in place and the future cabinet will give it more support.
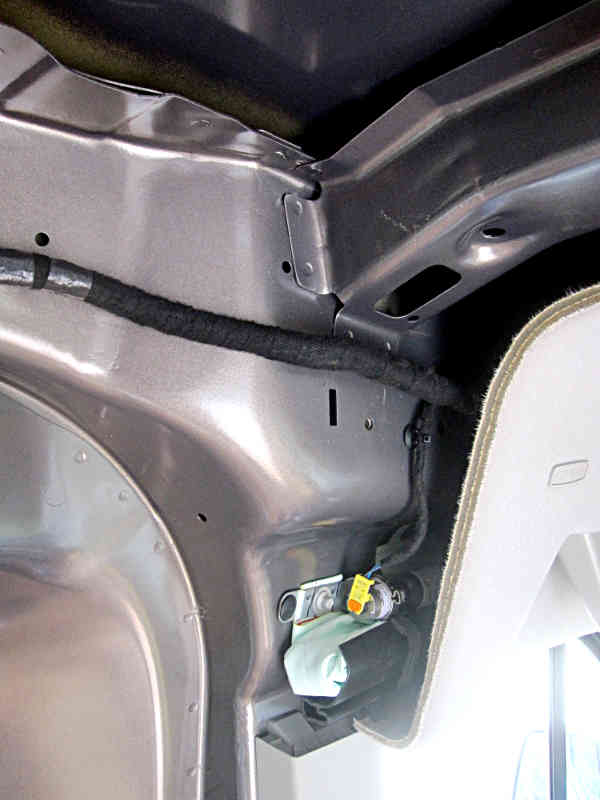
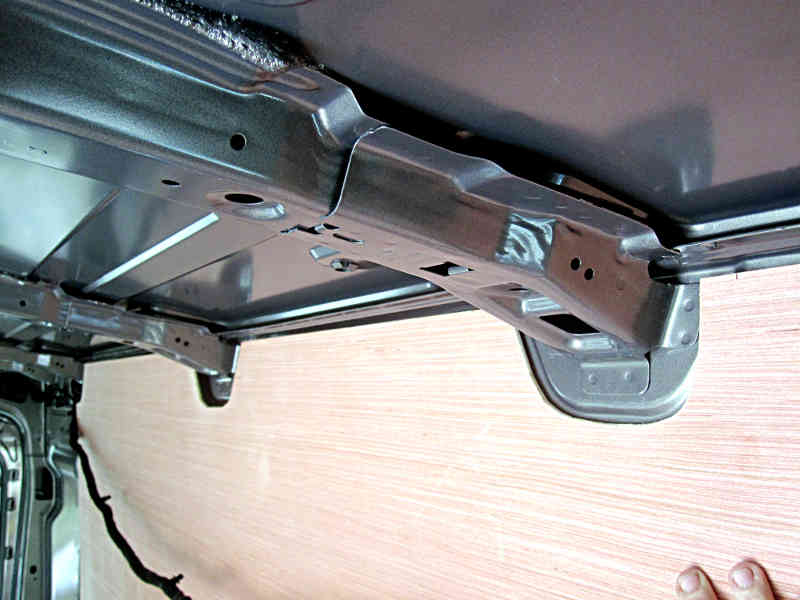
- Make paper templates of where the ceiling cross members touch the wall.
- Make a paper template for the top right corner.
- Temporarily fit the plywood to the wall and copy the template locations.
- Cut the plywood to shape.
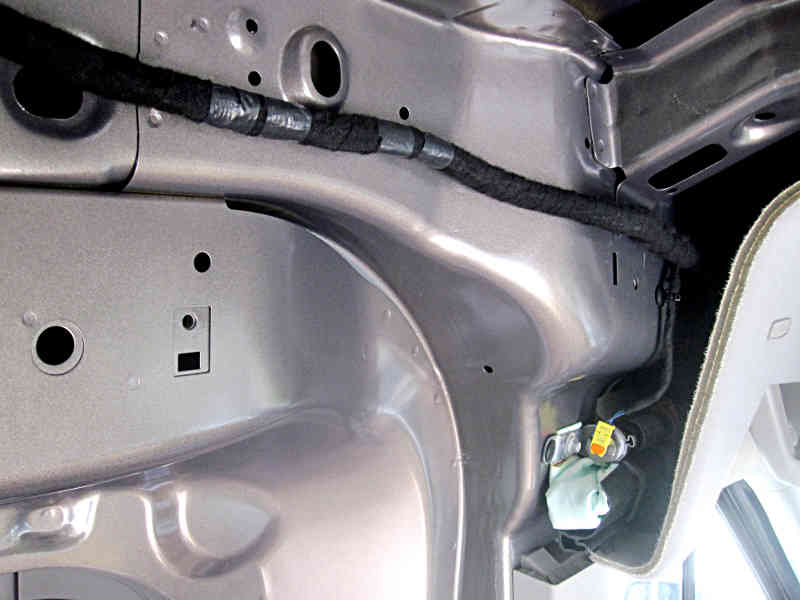
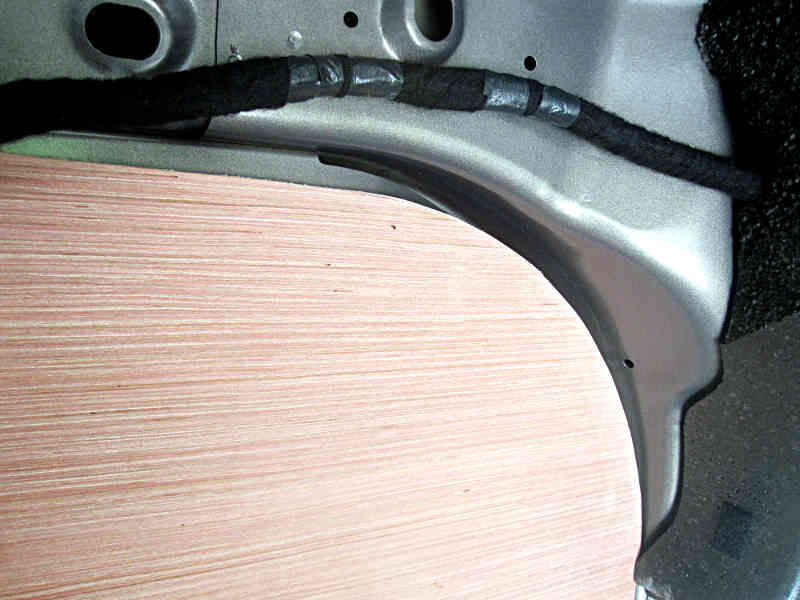
- Temporarily remove the wireway.
- Check how the plywood fits and adjust as necessary. I needed to add a square hole at the bottom of the panel.
- Reinstall the wireway.
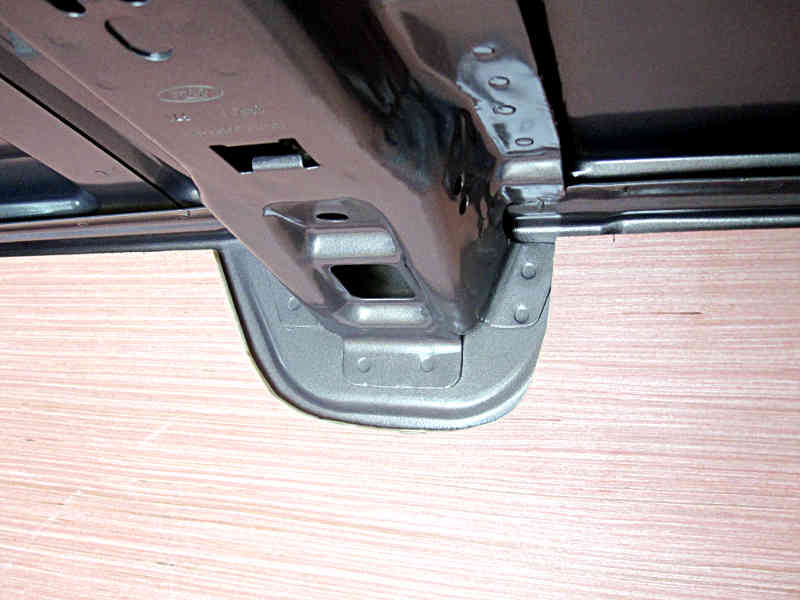
- Use some 3/4” plywood to create a ‘window support’ that is placed at the rear end of the panel, to close the gap between the window and the panel and to add a surface to attach the plywood panel to. Use a template as a guide.
- Drill a hole at the top and the bottom of the ‘window support’ for the bolts. Use a Forstner bit to encase the bolt head on one side and a slight depression for the plusnut on the other side.
- Fit the support and locate the plusnut location.
- Drill the hole into the metal wall.
- Clean out the hole and use paint to touch-up the exposed metal.
- Insert the plusnut and use two wrenches and a spare bolt, nut and washer to tighten the plusnut.
- Connect the support to the wall and repeat for the bottom hole.
- The bottom hole offered limited space to insert the plusnut, but it fitted well after it was tightened.
- All parts will be removed and sealed, painted or otherwise finished and permanently reinstalled after the cabling and insulation are done.
- To be continued.

Conclusion
A basic project that, with a little understanding, most of us can accomplish in a short time. If you are unsure, leave the side airbag mechanism as it is and build around it.
Other projects of this Van Conversion:
- Mod 1: 12V OUTLET TO DUAL USB
- Mod 2: BACKUP PARKING SENSOR
- Mod 3: CABIN CURTAIN
- Mod 4: INSULATED FLOOR
- Mod 5: FLOOR VENT
- Mod 6: MURPHY BED/DESK
- Mod 7: CCP FUSES
- Mod 8: FRONT PARKING SENSOR
- Mod 9: CAR RADIO REPLACEMENT
- Mod 10: 4 CAMERA MOBILE DVR
- Mod 11: ROOF VENT
- Mod 12: 15 AMP HOOKUP CABLE
- Mod 13: SHOWER-IN-A-BOX
Disclaimer:
I’m just a DIY’er with a lot of common sense, but with some of the projects I do use some tools and materials, when you really have to know, what you’re doing. Always read the manual and consult an expert if you’re in doubt.
Thank you so much for your information and help! I feel like I can finish my van now. I was really stumped when I got to the wall panels. I’ll be ordering plusnuts!
Thank you again, Laura
Hey Laura,
You’re on a roll! Good to hear that your conversion is working out. I’m always interested in (private) van conversions. If you ever have time to make some pictures, keep me in mind!
Van Williams
I cut out and made the air vent like you showed and it works amazingly well!
Thank you so much!
Thank you for posting your feedback! It’s always great to know, when others have a practical use for one of the posted ideas. I hope, it will serve you well.
Van Williams
When you say remove the wireway casing, do you mean take the attachments out that are holding the vehicle’s wires at the top of the driver’s side wall? (This would leave all the wires attached but slightly maneuverable.)
Yes, but be very careful with that. You cannot have those wires just hanging like that and it may also affect the cars warranty. I removed it, so I could work on the cabinets that I will be hanging on that wall. Those wires will be hidden behind the cabinets and fixed in place.
Van Williams