
UV-LED Water Treatment
This page may contain affiliate links that I am compensated for at no cost to you. Please check out my privacy policy for full details, and thank you for supporting the site!
NOT a sponsored article.
I bought this water treatment system myself as a hopefully better replacement for my current Berkey water filter.
Acuva ArrowMAX 2.0 UV-LED
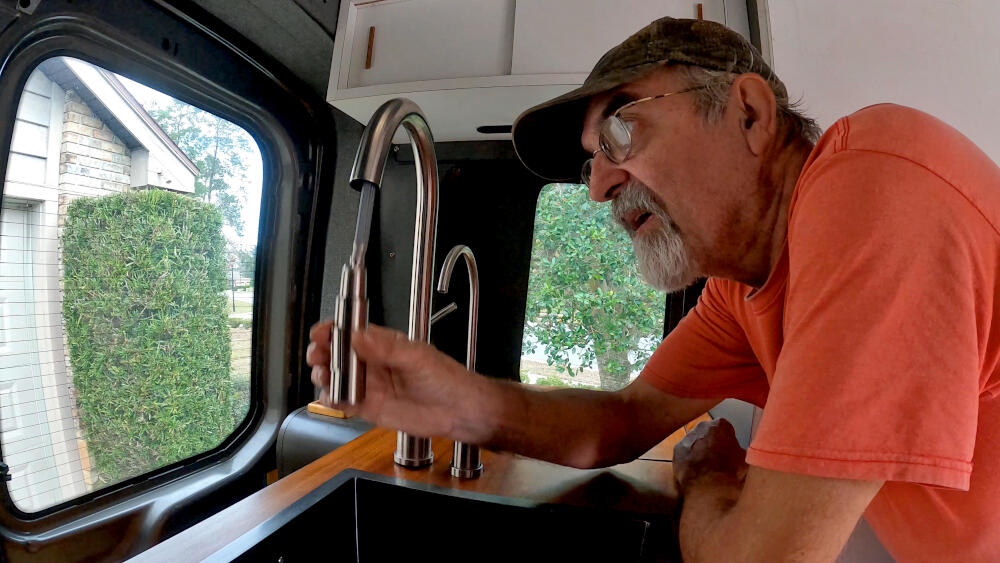
The Acuva system works with a pre-filter and an UV-Led to clean the drinking water in my van, during my travels through the US.
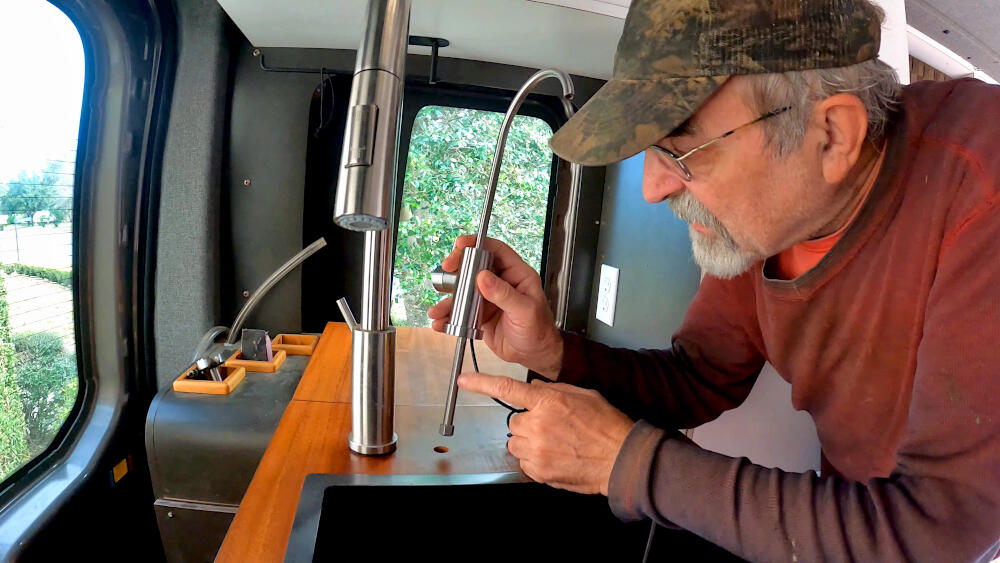
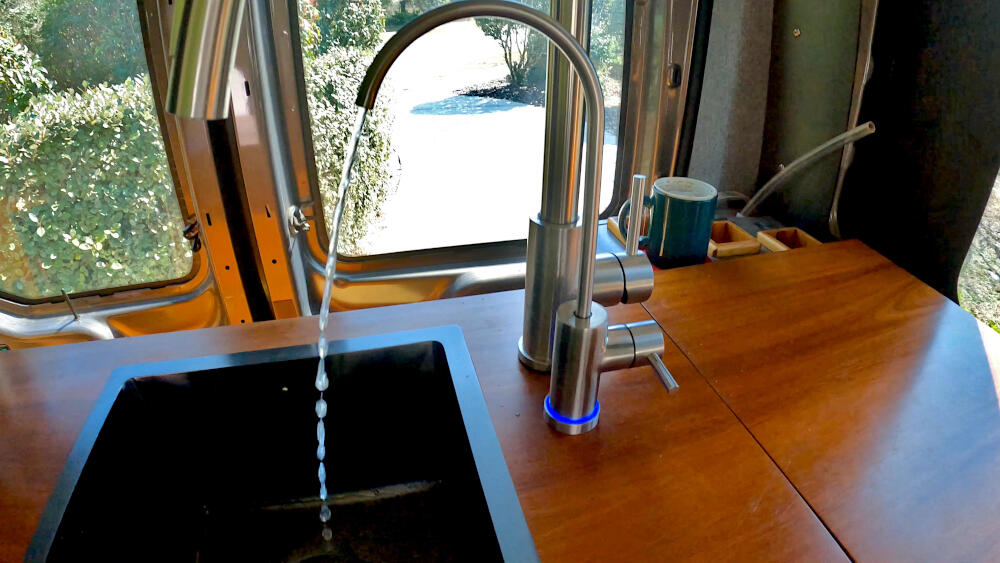
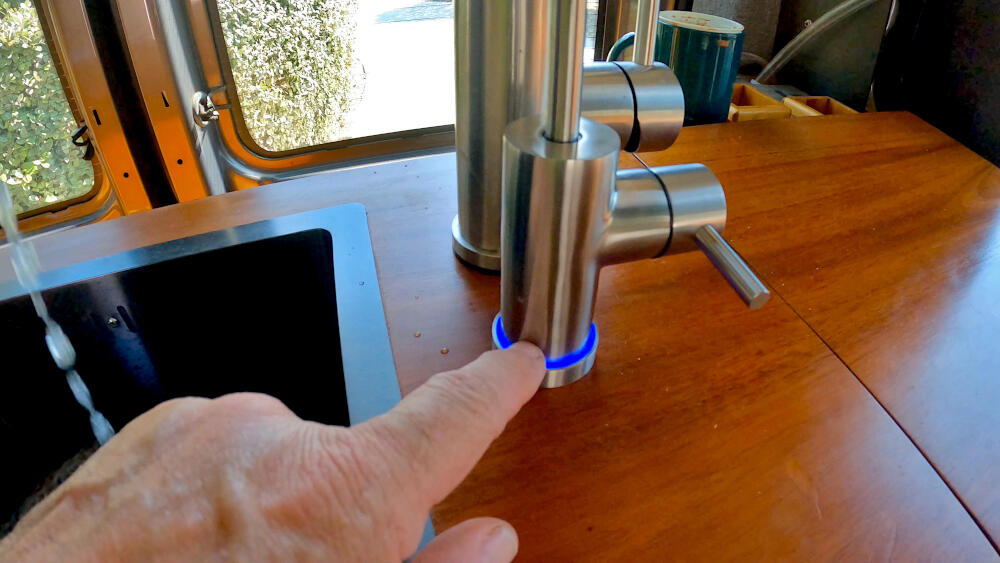
All supplies to install this system are included in the kit, the special faucet is optional, but in my opinion a welcome addition.
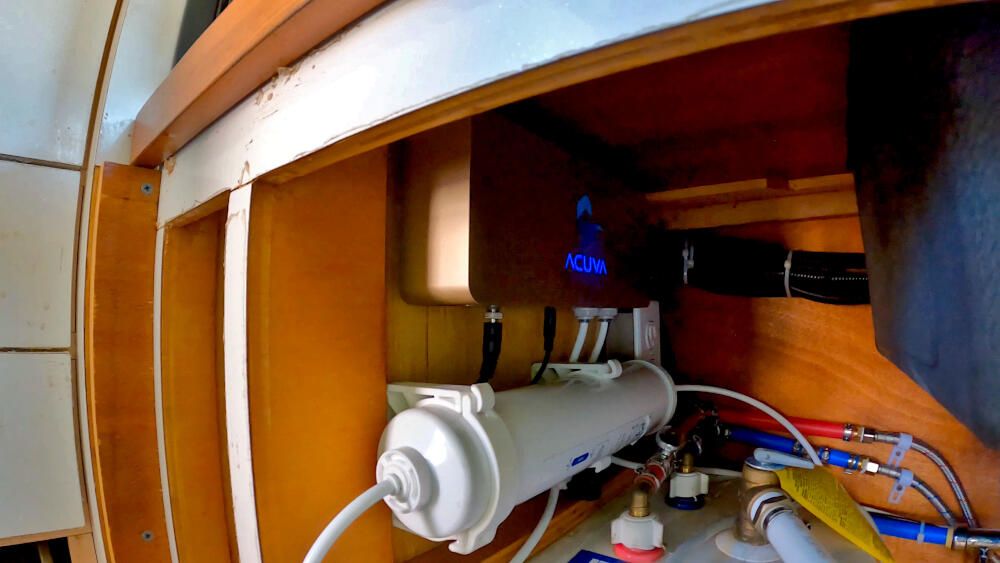
It comes with an optional faucet that is equipped with a blue lamp, showing when the UV-Led is working.
Considerations
I will review this water system later, when I have had the enough opportunities to use it while living in the van. While I am convinced abut the need to filter the drinking water while in the van, I am still not sure how effective these kinds of systems are. Yet I am convinced about the advantages of the Acuva water treatment system over the Berkey, which I used before.
No opinion about their effectiveness, but the bulky Berkey system and its constant filling, emptying and storing of the unit will not be missed anytime soon!
BUILD GUIDE UPDATE
Be the first to receive an update, when a new Project is added to this Build Guide. I also include a monthly overview of newly posted videos.
Materials
Acuva ArrowMax 2.0 UV-LED Water Purifier
with Smart Faucet
9.4″L x 3.9″W x 1.9″H
30.000 gal
Tools
Carbide Forstner Bit Filler Set
Carbide
Hex
6.6″ x 13.5″ x 2.7″
DeWalt Drill
8.0-Amp
3/8-Inch
Corded
Variable Speed Trigger
Metal Hacksaw
12″ Blade
Wing Nut Tension Control
Cable Ties
UV resistant
black
8 in
100 pack
Water Treatment System Installation
Optional – Read through and understand this entire project first
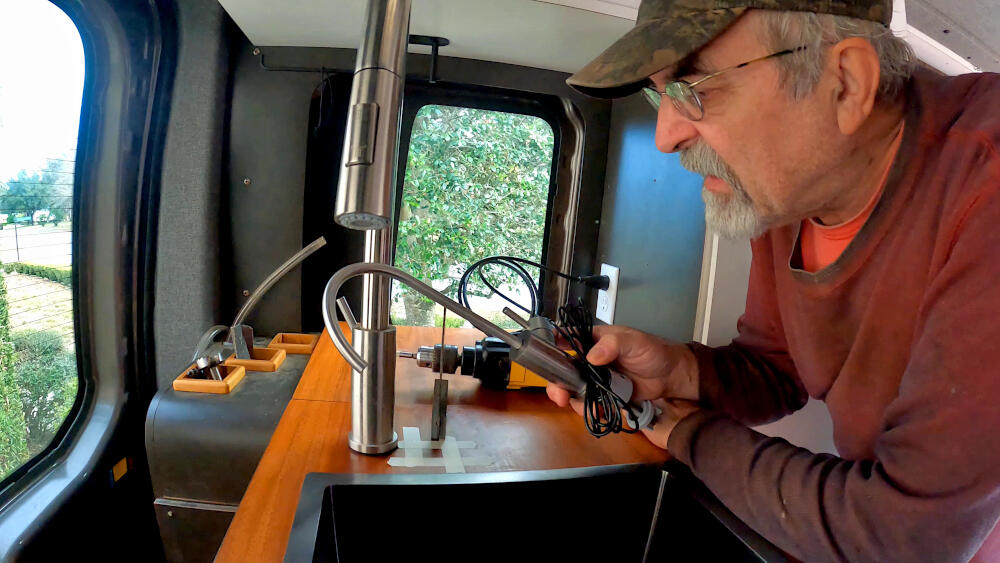
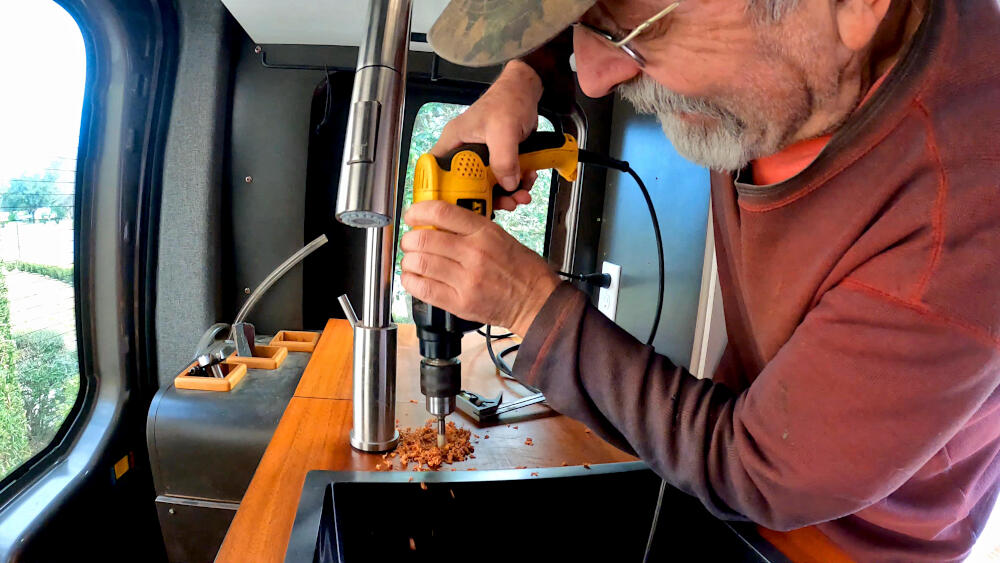
- Start by drilling a hole, if you have a wooden countertop like me; otherwise, insert the Acuva faucet into the extra hole available in your sink. I use a Forstner bit to get to the right diameter.
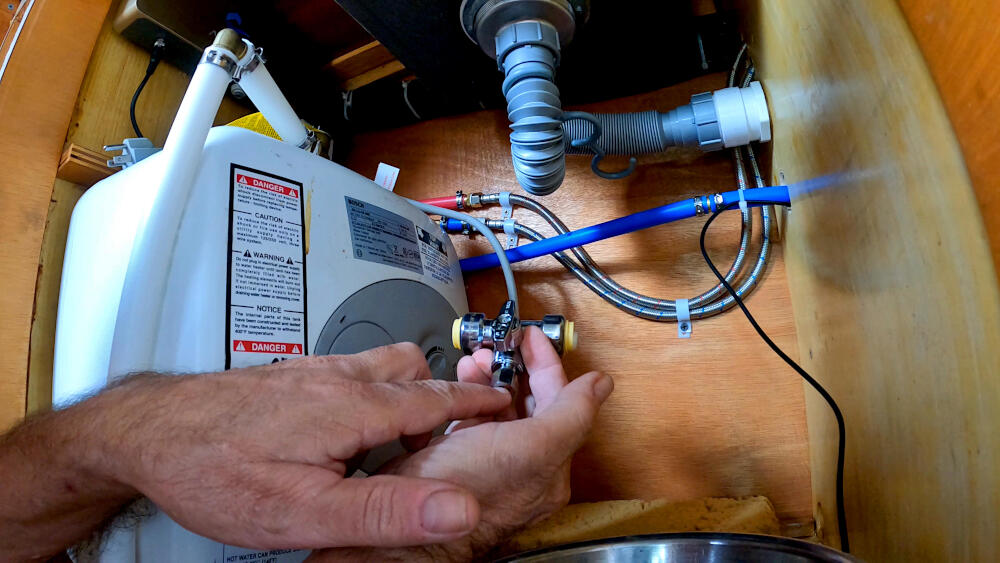
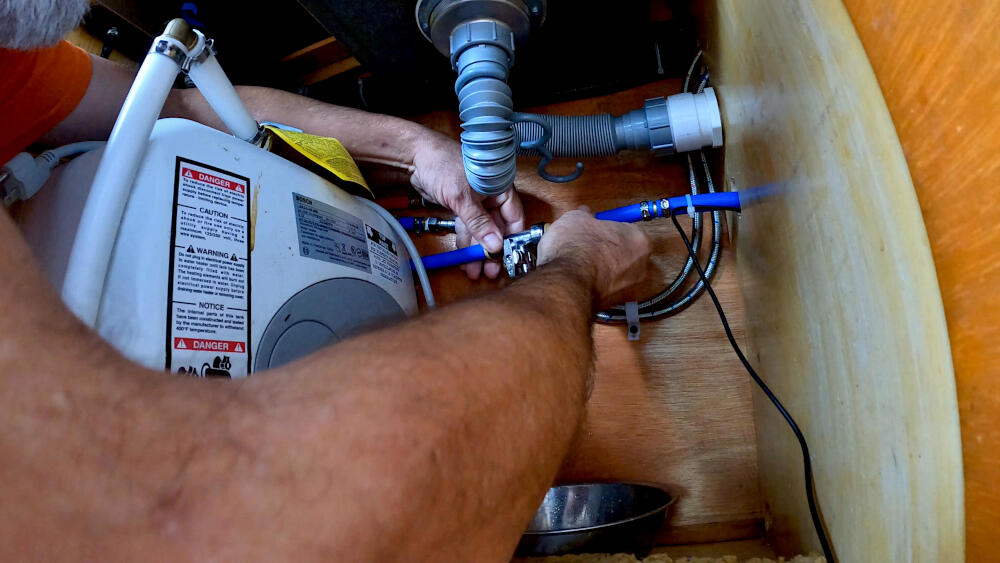
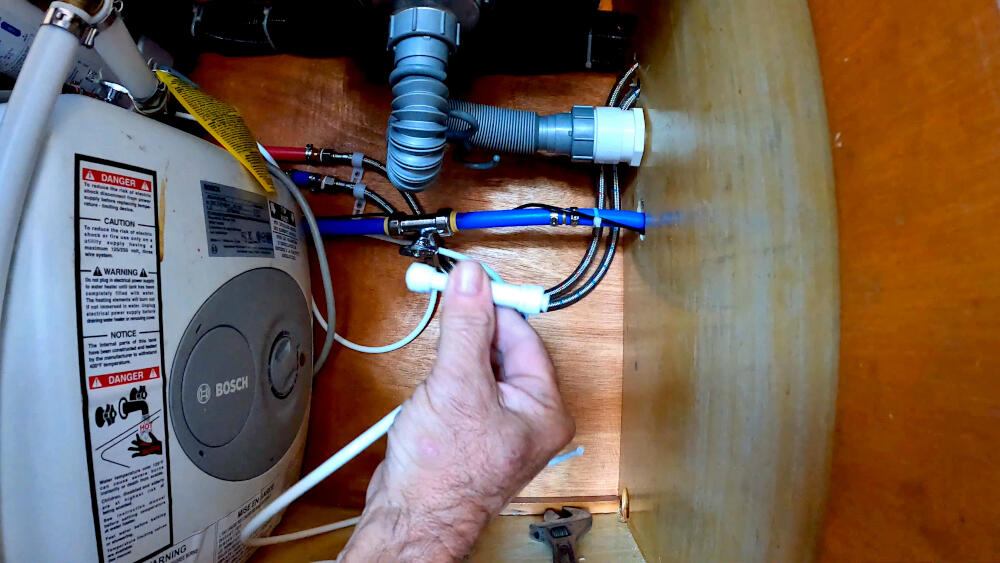
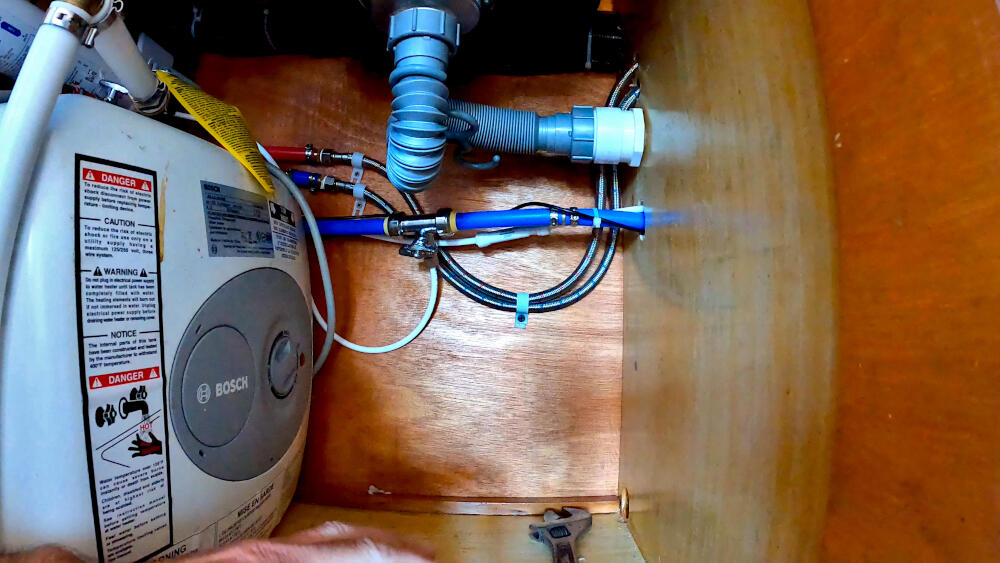
- Proceed under the counter to extend the water supply, by adding the included T-connector to the cold water line which originates at the fresh water tank. If your water line is not PEX, you will have to get the appropriate substitute.
- Install the main unit by first fastening the included DIN rail to the wall; the main unit hooks solidly into the rail.
- Connect one side of the supplied 12V power wire to a fuse at the main fuse box at the Lithium battery bank and the other end to the Acuva main unit.
- Next are the two supports for the filter cartridge. Install the supports on the wall below the main unit and push in the pre-filter cartridge.
- Connect the narrow water tube, that is included in the kit, to the earlier installed T-connector at the main water line by tightening a nut; push the other end into the appropriate side of the cartridge.
- From the other side of the filter a similar water line is installed between it and the main unit.
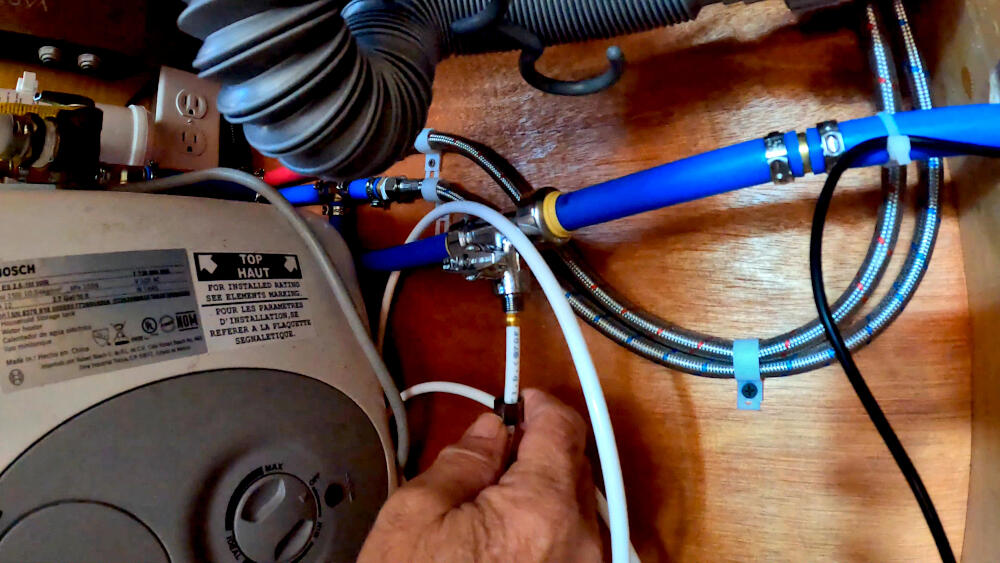
- While at the main unit, I also attach a similar line, that will end up connected to the water faucet.
- Another 12V line is also inserted into the Acuva main unit. This wire comes from the blue indicator light, that is built-in into the faucet,
- The flow reducer is inserted into the narrow water line that leads to the special faucet. This tube is then connected to that special faucet.
- Finally, all wiring and water lines are cleaned up and tied to the existent lines along the wall.
materials
- Acuva ArrowMax 2.0 UV-LED Water Purifier
tools
- Forstner bit
- Drill
- Hack Saw
- Wrench
- Phillips screwdriver
- Zip Ties


QUESTIONS, SUBMISSIONS OR CORRECTIONS
The missing parts of the complete van conversion process are being added regularly to this Build Guide. If you want to suggest a specific build option for this guide, submit a content correction or have a general inquiry, send me an email.
Error: Contact form not found.
Disclaimer: Throughout this guide, all guidance, building techniques and other information are based on my own experiences of converting a cargo van into a Tiny House on wheels. This guide is only for informational purposes; always build according to local and national standards. Be aware that such a project is expensive, requires a substantial amount of broad knowledge of building techniques and involves more work hours than you can imagine. Besides of hitting a finger with a hammer, much more serious harm can be done when you work with 12V/120V electrical systems, propane installations, power tools, etc. Tapping into the vehicle’s own systems can also damage its functionality. Get professional help where needed; never take any risk!