I install a cabin filter in my 2016 Ford Transit, create a semi-automatic tire inflator, add a combined smoke & CO2 alarm and add more strips along the edge of the ceiling to secure and finish the ceiling.
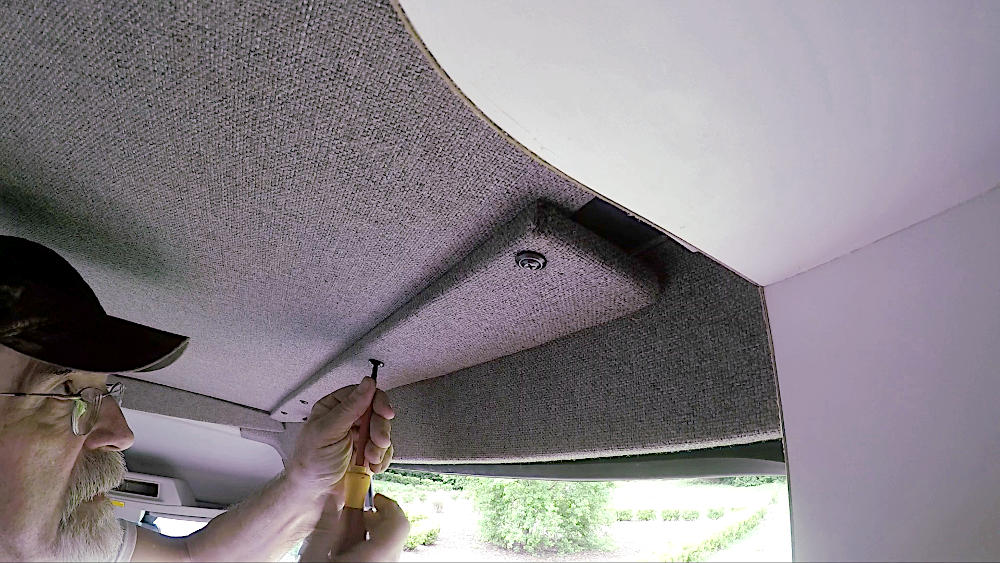
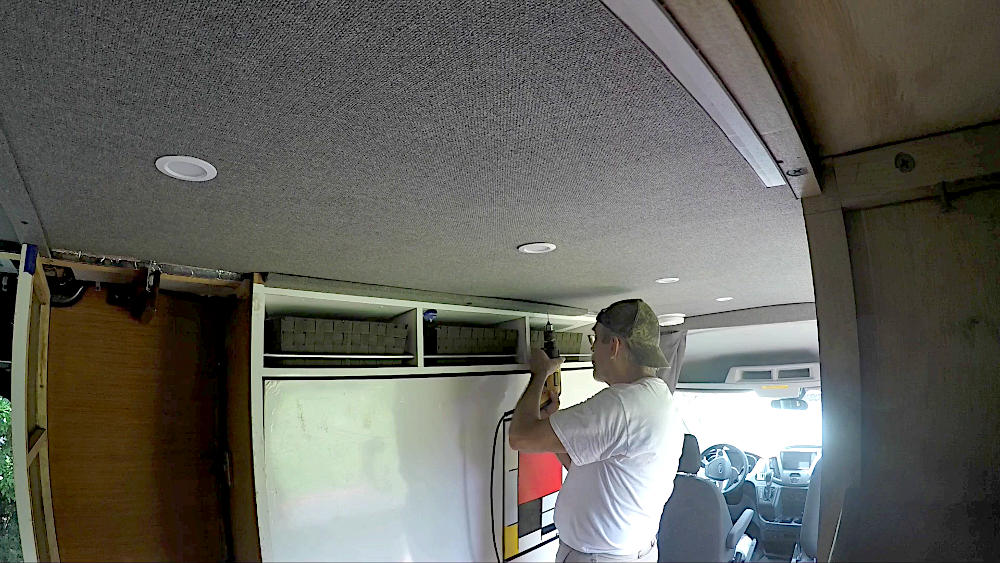
The main objective now to finish the ceiling throughout by placing Tweed covered strips along the sides of the ceiling; this will lock the ceiling panel in place. Several other additions and modifications, will make life in a van simpler and safer.
[videojs_hls url=”https://d3as8i8c4awtvd.cloudfront.net/a31dc410-02a2-4b8c-828d-6eea5f117c78/AppleHLS1/CEILING-ETC-AWS.m3u8″ mp4=”https://d3as8i8c4awtvd.cloudfront.net/a31dc410-02a2-4b8c-828d-6eea5f117c78/FileGroup1/CEILING-ETC-AWS_Mp4_Avc_Aac_16x9_1920x1080p_24Hz_8.5Mbps_qvbr.mp4″ poster=”https://cargovanconversion.com/wp-content/uploads/2021/07/art-feature-1500.jpg” width=”1280″ preload=”none”]
CABIN AIR FILTER
On my travels throughout North America, I will encounter many dirt roads, especially in the desert southwest. One of my goals is to avoid that dust from entering the vehicle. One of the place, dust can enter, is through the floor vent. A built-in blast gate is a good method to keep that under control. Another major entry point is through the A/C and ventilation system. One way to keep the dust from entering the cabin is, to use the cabin filter housing. All the US Transits have one, with easy access behind the glove box.
One peculiar detail however is, that Ford only makes cabin filters available for it’s later models; my 2016 Ford Transit isn’t one of them. A little research quickly steered me to the Ecogard #XC11577 cabin filter, which ended up being a suitable substitute.
Installation was quick. I opened the glove box and pressed the two lips at the top of the glove box, to release the door. The cabin filter housing is immediately behind it. A long, narrow access door can be opened from the left and removed. This gives you full access. After the filter is pushed in, the door is reinserted and the glove box (with the two lips pressed in again) is pushed back in place. Under heavy use, you’ll probably have to clean it once a week and replaced frequently.
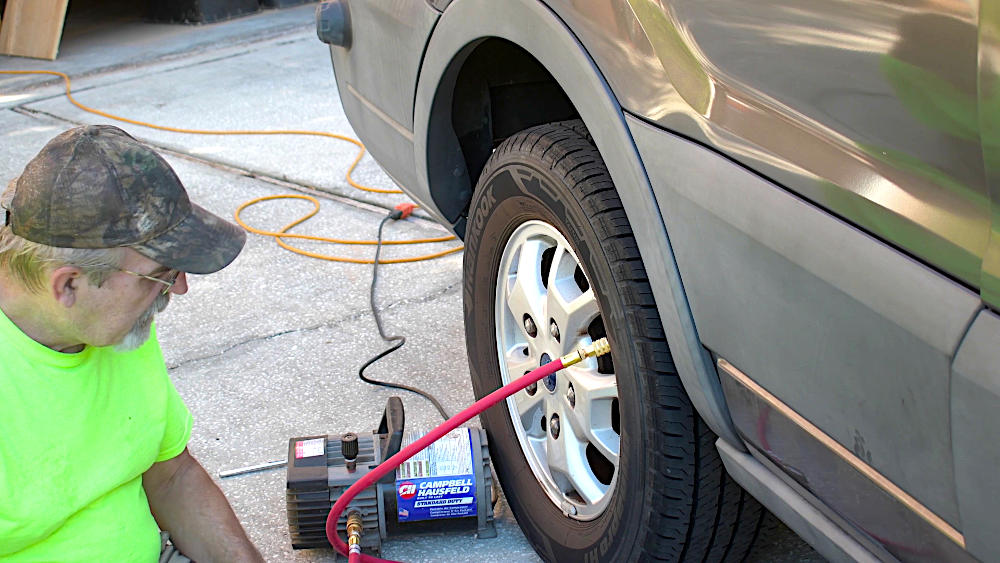
TIRE INFLATOR
Another mod makes inflating the tires easier. Not necessary for regular use, yet a nice improvement for all the time that I will be deflating and reinflating the tires, during the times that I have to drive on long washboard roads or when I get stuck in the sand or mud.
I will bring along an old and somewhat clunky, yet highly reliable 110V tire air compressor with me, that I may replace in the future with a slimmer 12V model. The modification consists of two 3′ air hoses, a pressure gauge, a lock-on air chuck and a quick release connector. The gauge fits between both hoses and one end of this set, gets the quick release, which connects to the compressor; the other end receives the air chuck.
Now I can just sit in my chair and watch the pressure gauge until the air in the tire reaches the right pressure.
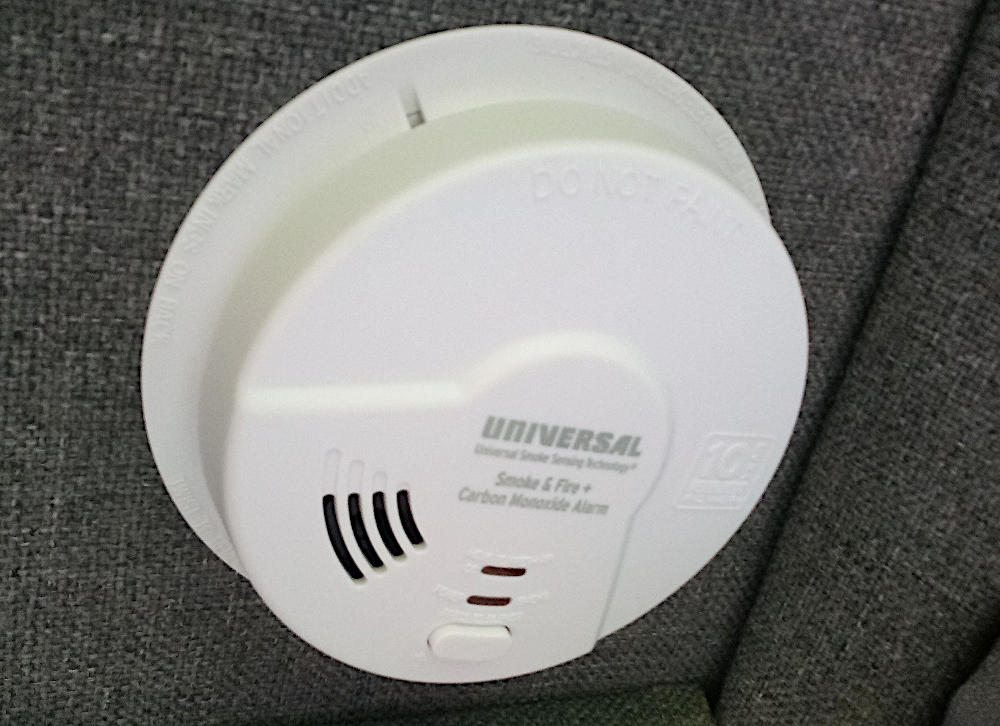
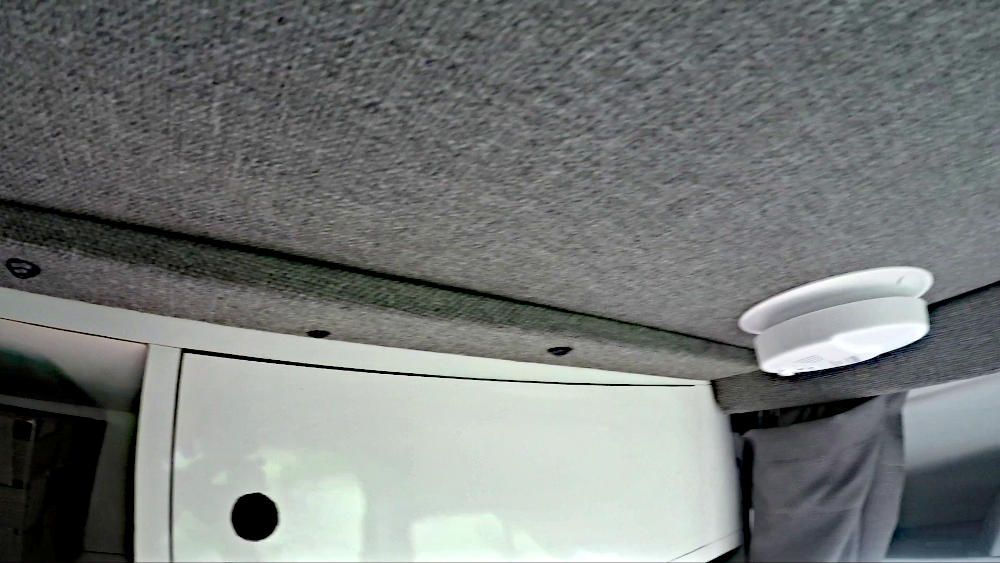
SMOKE & CO2 ALARM
An easy and fast addition that makes living a bit safer is, a combined Smoke & CO2 alarm. While I don’t specifically need a CO2 detector in my propane-free van conversion, I still decided to go with a combination model. The additional CO2 detection will hopefully protect me, if at some time, carbon dioxide expelled by the vehicle, would enter the interior of the van.
I found the Universal 3 in 1 Smoke Fire & Carbon Monoxide #MIC3510SB, an affordable model with good reviews. Installation is as easy as fastening two screws and removing a temporary battery safeguard. I placed the alarm as far away as possible from the kitchen area and right above my bed on the ceiling. It’s ten year battery will keep it running, with only regular testing.
CEILING FINISH
The 8′ x 4′ ceiling panel is only held up against the roof with some 3M Dual Lock Velcro. For additional support, I am adding narrow plywood strips along the sides of the ceiling. They vary in width up to 2-3/4″ and have a one inch slit along one side of the plywood board, that fits over the angled aluminum pieces at the top of the walls. Like the ceiling panel, these boards are covered with the same automotive Tweed fabric. After these boards are fitted over the aluminum strips, I use black-headed screws and black finish washers to secure the plywood to the aluminum strips. An unexpected warping of the ceiling panels at the sides, made me add a few black screws on the opposite side of the plywood strip. Due to the additional length of these screws, I used special, long black shingle screws.
TOOLS & MATERIALS*
Cabin Filter
Tire Air Chuck
Smoke/CO2 Alarm
Automotive Tweed
3M Dual Lock Velcro
Black Screws w/Black Washers
Black Screws w/Black Washers (long)
Inflator Hoses
Tire Pressure Valve
Angled Aluminum
*Some of the links above and in the video, are affiliate links, meaning at no additional cost to you, I will earn a small commission if you click through and make a purchase.